
Contents |
This tutorial will explain the basics about using Maperitive. We will go through the user interface, load some map data and then make a nice map image that you can then use in other software.
Note: if you haven't done it already, please read the Two Minutes Introduction To Maperitive and then return back here.
When you start Maperitive, the first thing you'll notice is the map. As we explained in the Two Minutes Introduction To Maperitive, it's actually a web map. You can see that it is a web map by looking at the Map Sources window at bottom right of the screen:
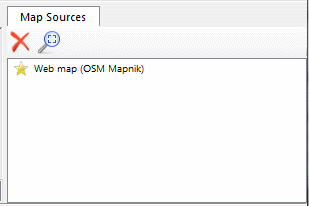
The Map Sources window shows the list of data sources that your map uses. Initially, it's just a single web map.
At the bottom left part of the screen we have a Commander window:
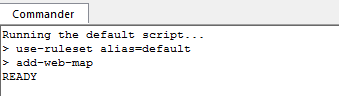
It is basically a "ship's log" of what goes on in Maperitive. Initially it says something like "Running the default script...". You see, when started, Maperitive runs a default script that loads a web map as a source. You can run other scripts, too, but more about that in later tutorials.
Below the Commander window, there is a Command Prompt text box:

Right now, the text box is in gray color - this means it's not active. By pressing the Ctrl+Enter keys, you activate it and it becomes yellow. You can use the Command Prompt to type various commands and thus control Maperitive. For example, type "zoom-in" and press Enter:

The map is the main feature of Maperitive. Most of what happens, happens on the map. So it's good to get to know how to move around it:
Looking at the tired old OSM base map soon becomes boring, doesn't it? We want our own map style, after all that's why you gave Maperitive a shot in the first place. To be able to draw our own maps with our own content and styling, we first need to provide Maperitive with some vector map data. For the purpose of this tutorial I recommend getting hold of some small OSM XML file. There are various ways you can obtain OSM XML files:
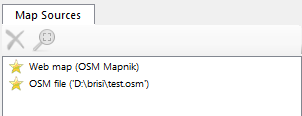
Once you have an OSM file on your disk, you can use File | Open Map Source... menu command to load it onto the map. Or you can simply drag and drop the file onto the map, the effect is the same. You can now notice that you have two map sources in your map:
To really see the vector map in action, we will now hide the web map. You can do this by clicking on the yellow star beside the web map in the Map Sources window. The star will turn gray, which indicates it is now hidden.
Now let's change the map style a little, just for the fun of it. Select the Map | Edit Rendering Rules menu command and your favorite text editor should appear with rendering rules loaded. Without going into details about rendering rules (you can read more about them Rendering Rules Introduction), we'll do a simple hack: change the color of residential streets from white to red. In your text editor, search for the "$regex("(.*residential)" text (without the quotes). You'll find text lines that look something like
	elseif : $regex("(.*residential)|(.*unclassified)")
		define
			min-zoom : 13
			line-color : white
Change the "line-color : white" line to "line-color : red" and save the file. Now look back at the map. Your residential streets should now be in red (you might have to zoom in close enough to see it).
Now undo the changes in the rules file - red streets look ugly.
Now that we have explored the basics of map styling, we can visit one of the other important functions of Maperitive: exporting maps so that they can be used in other programs, be printed or published on the web. Although you can export the map into various forms, in this tutorial we will cover only exporting into bitmaps.
Exporting the map is actually quite easy: move the map to the area of your choice and select the Tools | Export To Bitmap menu command. What you see on the map will be directly exported into a file called output.png on your disk (the full file path will be shown in the Commander window).
This is the simplest scenario for exporting, but the export-bitmap Command has many parameters that allow a lot of control of how the exporting gets done. But I'll leave this for another tutorial.
